
Measuring, Planning and Cutting Methods for Chainsaw Operators
The first two articles in this series discussed the risks of chainsaw operation as well as chainsaw safety, planning and precision felling techniques. In this final article, I will discuss several other topics that chainsaw operators should be knowledgeable about, including how to estimate tree height, make an open face notch and use felling wedges.
Estimating Tree Height
An important part of felling trees is the ability to estimate a tree’s height in order to determine its position as it falls, hits the ground and comes to rest. Accurate height estimation allows the operator to determine if felling the whole tree is truly the best approach in a given situation and, if it is, helps the operator to avoid hitting or brushing against obstacles, hanging up trees and leaving behind dangerous branch hangers. Remember that the height of the felling cut will affect the felling path and the position of the tree when it reaches the ground.
Although there are a variety of tools and instruments to help determine a tree’s height, it can be quite helpful to familiarize yourself with simple field methods like the stick trick technique. To implement this technique, first find a 3- to 4-foot-long stick. With your arm held straight out in front of you, hold the stick parallel along the length of your arm and use it to carefully measure the distance from your eye to your hand. Next, keep your arm in the same horizontal position, but adjust the stick so it is completely vertical to your arm. The distance from your eye to your hand should equal the distance from your hand to the top of the stick. By following these steps, you will have two sides of a right triangle.
Now, holding your hand so that your arm is parallel with the ground/grade between you and the tree, walk forward until the top of the stick – which is still being held vertically – is in line with the top of the tree. Make note of where the bottom of the stick meets your hand and lines up on the tree. If the felling cut is made at that point, the top of the tree should land where you stand. If the felling cut is to be made below this point, the tree will be taller. If it is to be made above this point, the tree will be shorter. To see a demonstration of the stick trick technique, a helpful video can be found at www.youtube.com/watch?v=aQv13Bn4hAc.
Another measuring method similar to the stick trick technique is to stand perpendicular to the felling zone and walk forward until you can see the top of the tree. Using the stick in a similar way held at arm’s length, measure the height of the tree and then, rotating the stick parallel to the ground, estimate where the top of the tree will come to rest.
Today, many utility foresters have rangefinders for measuring tree height, and numerous field techniques are discussed and explained on a variety of websites. Whatever method you use, you must practice often in order to learn how to use it well, make adjustments and correct for the many variables, especially in tight, tricky, critical situations.
The Open Face Notch
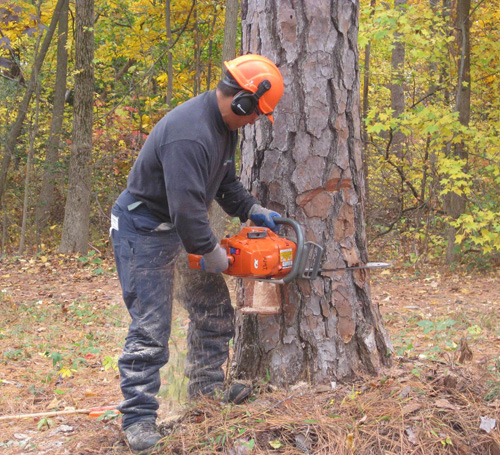
The previous article in this series only touched briefly on the open face notch, so I’d like to give you more in-depth information about what it is and how it should be made. Essentially, the open face notch is exactly what it sounds like – a face-notch opening of 70 degrees or greater. Provided sound hinge wood exists, using the open face notch allows the hinge to work longer and with a greater degree of control as the tree is felled. Because of this extra control, the back cut can be made level (no step) with the apex of the open face notch, unlike the stepped back cut that must be used with a 45-degree face notch.
In the past, the traditional rule of thumb for the depth of the face notch was one-third the depth of the tree. A more up-to-date approach is to focus on the length of the hinge rather than the depth of the cut. Cut the face notch just deep enough so that the length of the hinge produced will be a minimum of 80 percent of the tree’s diameter at breast height, or DBH. For a stronger felling hinge, avoid cutting the face notch deeper than 30 percent of the diameter of the tree at the cut.
When making the open face notch, make the top cut first. Line up the top cut while bracing your body against the tree and facing the felling direction, using the felling sights that are provided on today’s professional chainsaws. Avoid placing the hinge where there are cracks, cavities, knots or decay. Using the top cut as a sight, line up the bottom cut, avoiding cutting too far into the hinge wood and creating a bypass. Bypassing cuts into crucial fibers of the hinge will reduce the hinge’s effectiveness and cause it to prematurely fail. You can avoid bypass cuts by sighting through the top cut and frequently checking both ends of the notch while cutting.
When felling trees, the front and back of the hinge should be parallel and of the same thickness at each end. This will help to assure systematic hinging and maximum control. The rule of thumb for hinge thickness is 7 to 10 percent of the tree’s diameter depending on the strength and flexibility of the wood fiber, moisture content, wood temperature and DBH of the tree.
Felling Wedges
It is always a good idea to have a couple of good plastic felling wedges available whenever felling trees. Although they are often an overlooked tool in our business, when appropriately placed, a wedge can prevent the chainsaw bar from becoming pinched in the back cut, particularly if the tree leans backward.
Lifting a tree just 1 inch with a wedge at the back cut can move the top of a tree several feet. The amount that the top can be moved depends on the height and girth of the tree and the number of wedges being used.
Learning to use wedges for bucking logs and, at times, limbing trees with large limbs can also be enormously helpful to the operator when managing tension, compression and torsion to prevent the chainsaw bar from becoming pinched. For more information about using wedges, visit www.osha.gov/SLTC/etools/logging/manual/felling/felling_direction_wedges.html and www.osha.gov/SLTC/etools/logging/manual/felling/cuts/special_techniques.html.
Felling Control Tag Lines
I briefly discussed using rope to pull a tree in the second article of this series. Remember that it is well worth learning how to simply, efficiently and safely install a pull rope in a tree from the ground. With practice, it can also become useful to set a throw line with a Big Shot – a vertical industrial slingshot – or to throw a line by hand by attaching it to a shot pouch and then installing a larger pull line. A running bowline can be tied from the ground and then pulled into place if the path is clear. Or, many times it is easier and faster to simply tie off one end of the rope just above the felling cut. Be aware, however, that this may require longer lines.
Now let’s discuss a similar rigging method that can help support the felling hinge in order to resist side lean and improve the safety of a felling operation. Once a line is properly chosen and set in the tree, the bottom end of the line is anchored to another tree or a suitable anchor perpendicular to the felling notch opening. Properly positioned, tensioned and anchored, this felling support tag line can offer a great deal of side-lean support to the hinge as long as the path is clear for the tree and the tag line.
Once the face notch is properly made, lay a long, straight stick in the apex of the felling notch. The stick will point at 90 degrees – or perpendicular – to the working direction of the hinge to an imaginary line along which the felling support tag line must be anchored. Then, anchor and apply tension to the tag line somewhere along that imaginary perpendicular line.
It is vital that the felling support tag line be anchored with tension out from the tree some distance, at a 90-degree angle and perpendicular to the felling direction. The taller and heavier the tree is, the higher the line should be set in the tree and the farther out from the tree the tag line should be anchored. The felling area must be clear so that the rope does not become entangled in other trees or obstacles during the felling operation.
When this method is properly performed, the felling support tag line will support the hinge, and the tension in the rope will remain throughout the felling process.
Responding to Storm-Damaged Trees
Working on and around storm-damaged trees is the last topic I’d like to discuss in this series. Many trees may be left especially damaged and dangerous after a powerful weather event, creating additional elements of risk that must be carefully addressed before work begins. Critical thinking and decision-making in these types of situations require thorough, well-executed job risk assessments (JRA) and job briefings.
As a standard operating procedure, many professions, including utility work, require that JRAs be conducted at each job site or prior to each task. Conducting a JRA and a crew briefing should be done in two separate steps, even if the JRA is completed as a crew. The JRA should function as a tool for operators and crew members to systematically assess the overall environment as well as the specific conditions associated with a potentially risky task. The crew briefing should serve to organize the crew and get the team on the same page. A JRA can also serve as “go” or “no go” criteria for crews with limited knowledge, skill, crew members or equipment. “HOPE” is a popular acronym among tree workers with regard to tree risk assessment and the completion of JRAs. Following is a more detailed explanation.
HOPE: Hazards, Obstacles, Planning and Positioning, Equipment
• Hazards: In addition to the traditional knowledge and skills that a proficient utility worker possesses, specific knowledge of trees and tree risk assessment is critical to conducting a proper JRA.
• Obstacles: At times, obstacles and hazards may be one and the same. However, hazards and obstacles should always be approached as two different concerns and assessed as such.
• Planning and positioning: Special planning, knowledge and skills are necessary to address storm-damaged trees. As always, proper operator and crew positioning work hand in hand to help produce safe operations.
• Equipment: Employing the best equipment for the job is essential to effectively working a plan and safely positioning crew members. In addition to knowledge, skill and work site specifics, equipment resources may also be the deciding factor in “go” or “no go” criteria, critical thinking and decision-making. Something as simple as a power pole can contribute a great deal of safety for operator positioning at critical times while also increasing overall safety and productivity.
Conclusion
Safety is always the overriding consideration when working with trees. Although tree work is an operation that is inherently risky, education and training, adherence to safety regulations, and today’s precision cutting methods and best practices can go a long way toward mitigating the risks. However, if a tree has been damaged by a storm, has extremely heavy side or back lean, or has been left to stand dead for so long that it has become extremely decayed, it may be necessary to carefully dismantle the tree piece by piece using a specialized bucket truck or crane.
About the Author: With more than 30 years of experience in the tree care industry, Ken Palmer is a well-known instructor, speaker, author, and developer of modern tools and techniques. A member of the ANSI Z133 Accredited Standards Committee and the Utility Arborist Association Safety Committee, and three-time International Tree Climbing Championship champion, Palmer has educated and trained thousands of tree workers throughout North America, Western Europe, Australia, New Zealand and Japan.